 Step 3 - Finish and create the project
On the final page you get the option to select the type of wwProcess class to create:
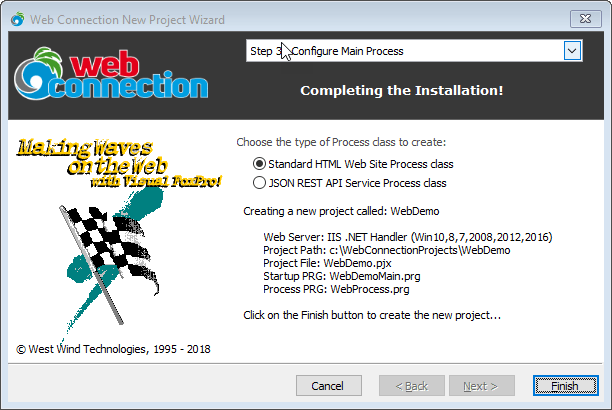
Your choices are:
Standard HTML Web Site Process Class
This is a standard wwProcess that you use to generate typical HTML based applications. Output is generated using the standard Web Connection output mechanisms that either explicitly from your code usingResponse.Write(), higher level functions likeResponse.ExpandScript()or using one of Web Connection's higher level framework features like the Web Control Framework. This is the default and most common choice.JSON REST API Service Process Class
Use this option if you need to build a Service that serves data rather than HTML. A REST API generally uses JSON data - although it doesn't have to - and is useful for services that are access by other applications, mobile devices, or by JavaScript front ends using rich client side frameworks like Angular, Vue or React.This option creates a process class based on the wwRestProcess class which by default works as a JSON based API service where each method in the class represents an API endpoint. Data can be passed to endpoints either using standard form data, or raw JSON data and results are returned as JSON. Unlike the standard
wwProcessclasswwRestProcessautomatically parses incoming data into JSON and parses outgoing data to JSON.
Start your Application
When the Wizard is done creating your project, it displays a message on the FoxPro desktop with some information on programs and URLs and how to launch your project:
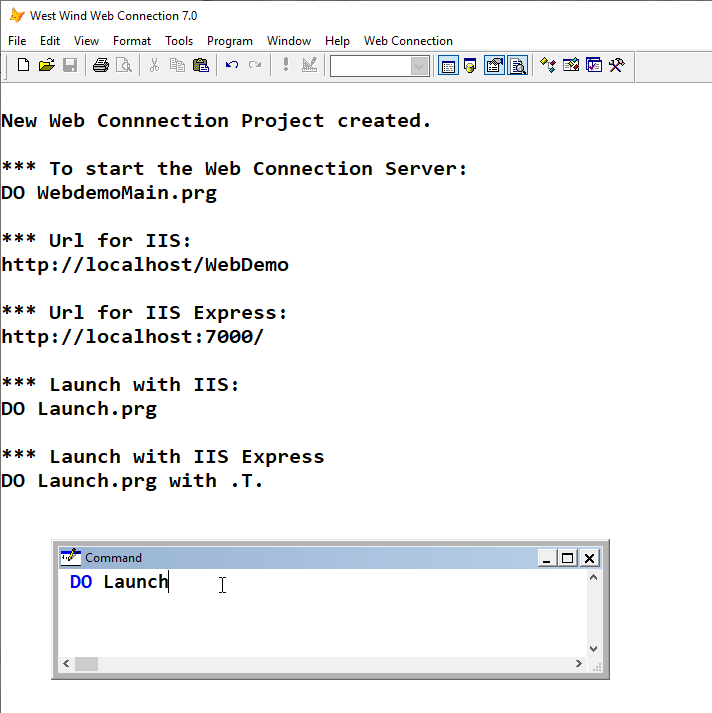
The easiest way to launch the application is to run the application with the generated Launch.prg command which is customized for your project:
For IIS:
        foxpro


     DO Launch
For IIS Express:
        foxpro


     DO Launch with .T.
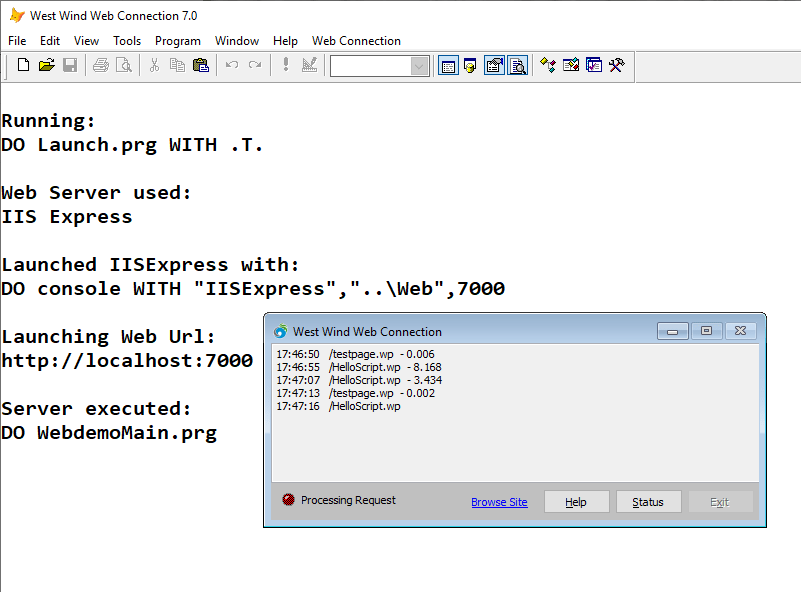
This does the following:
- Calls
SetPath.prgto set paths to the Web Connection installation - Launches a browser for the appropriate IIS or IIS Express URL
- Starts the Web Connection Server with
DO <yourApp>Main.prg
When you run the application with Launch.prg it also writes out some information on what it did for troubleshooting and to give you a better idea what's going on during launch:
What gets created
Here's a bit more information on what the Wizard actually creates behind the scenes:
Creates a Project Folder
The Wizard creates a project folder that contains subfolders for Web, Deploy and Data. Web contains all the HTML related resources - HTML, CSS, JavaScript, Images and templates. The start page is default.htm which includes a simple test link. The Deploy folder contains your code and project files. This is where your code goes and where you will end up building your compiled EXE that you can deploy.Creates a WebDemoMain.prg Server file
This class contains the Web Connection Server startup code where you can configure the behavior of your server. This class also includes some generated code that handles routing of requests to your Process class.Creates a WebProcess.prg Process class file This class is where you write most of your Web request handling code. Each method you create in this class corresponds to an HTTP request. You can access these methods with
. . So the HelloWorld method is mapped with HelloWorld.wp in this case. Creates a WebDemo_ServerConfig.prg file
The Wizard also creates a Server configuration file for IIS that can, via code, generate all the IIS configuration required to configure IIS. It creates the virtual, scriptmaps and adds file permissions and makes it possible to move your folder to a new location or machine and configure your server. You can run this PRG directly or use your compiled EXE server withWebDemo.exe "CONFIG"which runs the configuration script.Creates a Project File and EXE
The Wizard creates a new project for you and adds the dependent source files into it.
Shareware version: No Project Generated
Since the Shareware version is precompiled you cannot successfully build an EXE file from a project. Therefore with the shareware version no project is built and you will see a dialog that points out this fact instead. Even though no project is built, you can still run the project successfully by running the main PRG file for the application:
DO <yourproject>Main.prg. Other than missing the PJX and EXE files, everything else will be configured as described below.A Desktop Shortcut
A desktop shortcut that points at the Deploy folder is created for you so you can easily start the Web Connection application in the proper folder and configured with the associated config.fpw configuration. I recommend you use this shortcut to launch your project. The config.fpw folder contains path statements that link the project folder back to the Web Connection installation so that the required Web Connection dependencies can be found and are accessible when you run your application.SetPaths.prg
If you don't use the shortcut, you can runDO SetPaths.prgto set paths to the Web Connection Installation Folder and its root folder and.\classesfolder. These paths are generated at project build time, so if that path changes you'll have to adjust it in the PRG.Launch.prg
This file lets launch your Web Connection application. It callsSetPaths.prg, opens up your Web Browser and starts the Web Connection server. It can launch your site either for *full IIS or for IIS Express (by using a parameter of.T.).
        foxpro


     DO Launch.prg             && launches IIS URL
DO Launch.prg with .T.    && launches IIS Express and IIS Express URL
- BLD_
.prg
This is a build script that compiles your project and optionally allows you to upload to a live server. Compilation runs a regularBUILD EXEcommand, and if there are errors the errors are displayed.
If you run with a parameter of .t. - DO bld_webdemo with .T. the script runs in deployment mode, which first builds and then tries to the send the resulting EXE to your deployed server. You need to configure the script with the remote server url.
You set these two values:
        foxpro


     *** Server Update Urls - fix these to point at your production Server/Virtual
HTTP_UPLOADURL    =         "http://mysite.com/Webdemo/UploadExe.wc"
HTTP_UPDATEURL 	  =         "http://mysite.com/Webdemo/UpdateExe.wc"
_ServerConfig.prg
This file is generated by the Wizard to configure your application for use with IIS. The script creates a virtual directory (or root site) adds scripts maps, sets permissions and otherwise configures your application when you run it. This script requires Administrative rights to run and will tell you so.
Compiling your Project
Due to the way that the project is generated from within Web Connection's wizards some of the files may have been in use when the project was built resulting in a project that didn't get fully compiled.
So, the first thing you should do is to recompile the project:
- Click the Build button
- Select Win32 executable/COM Server (exe)
- Check Recompile all Files
- Click OK and build the project
- Once the project has built go back into the project and click on the menu Project|Project Info
- Click on the Servers tab and ensure the Instancing Popup is set to Single Use. This is required for COM operation to work properly. It's also the default so usually this value shouldn't change.
You can recompile the project at any time with one of the following:
        foxpro


     DO bld_webdemo
or
        foxpro


     BUILD EXE WebDemo FROM WebDemo RECOMPILE
Run the Server
You should now have a fully working project and EXE file. To start the server as an EXE file:
        foxpro


     DO WebDemo
However, while debugging to keep things simpler for running and debugging without an explicit compile step each time I recommend that you actually run the WebDemoMain.prg file instead:
        foxpro


     DO WebDemoMain
Or simpler yet:
        foxpro


     DO Load
The latter two run your server in development mode, so you can edit code and develop with SET DEVELOPMENT ON and so that you can make instant changes to your code without having to recompile each time. For development this is probably the best approach as it is very quick and requires the least amount of effort to restart a server after making a change.

Comment or report problem with topic